Get ready for Easter Egg Hunt with DIY Easter Bunny Boxes! Download the template bellow to make this cute bunny boxes, perfect for Easter eggs and all the treats found in Easter egg hunt!
━━━━━━━━━━━━━━━━━━━━━━━━━━━━━━━━━━━━━
Easter is one of my favourite holidays, not only because it`s full of chocolate and other treats, but it’s also the perfect time to make cute crafty things in beautiful spring colours. This week I’ve created a Easter Bunny Box and printable. This project is quick and inexpensive to make, and is ideal as a gift when filled with eggs, chocolates and other Easter treats. It is also a fun project to do with your kids to keep them busy before they start Easter egg hunt. If you love fun and cute DIY projects like me, check my DIY Easter Napkin Rings I shared last week, or just keep reading and let’s get crafting!
Materials:
- Bunny boxes printable (download at the end of this post),
- White A4 card or thick white paper,
- Scissors,
- Ruler,
- Bone folder (optional),
- Pom poms,
- Glue and double-sided tape,
Instructions:
- Scissors,
- Ruler,
- Bone folder (optional),
- Pom poms,
- Glue and double-sided tape,
Instructions:
Step 1
Download the bunny box template (see the end of this post for the free file) and print it onto white A4 card. Then cut out each of the boxes with a pair of scissors.
Step 2
Once you’ve cut out all parts, score along all the lines in the template using a ruler and bone folder.
Step 3
Fold the boxes along the lines you scored in Step 1. As you do this, each half of the box will start to take shape. Make sure you fold inwards so that the printed side of the box is on the outside.
Step 4
Apply glue or double-sided tape to each of the small gray tabs on the box. First find tab that says: "Fold and glue to the edge B" and glue it to the edge B. Then do the same with the tab that says: "Fold and glue to the edge A" and glue it to the edge A. Now all you have to do is to glue 3 more tabs to the bottom of the box.
Step 5
Once your tabs are stuck down, close the box and glue the handle to the sides of the box. Add a piece of double-sided tape to the back of the box and glue the pom pom tale.
Step 6
Download Easter Bunny Boxes Template
HERE
Download Happy Easter Card
HERE
P I N T H I S F O R L A T E R!!
Follow me on Pinterest HERE.
__________________
keep in touch!
Love FREE printable?
Sign up for my email subscriber list and get your free
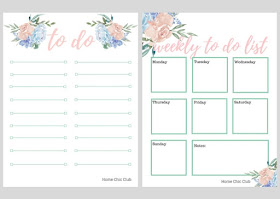
Daily and Weekly To Do List and much more to come.
Subscribers Only!


.png)


zaista zanimljivo,ovo sam u par navrata vidjela al je super ,slazem se sa tobom ds je jedan od slatkih,i da ih lakk mozemo uljepsati prolecnim bojama
ReplyDeleteSavrsen post,uzivala sam
Cekamo jos ovakvih zanimljivih postova
Jedan srdacan pozdrav od mene £
Hvala puno draga! xx
DeleteSo cute, I like this DIY print:)
ReplyDeleteThank you! :)
DeleteSuch a lovely inspiration for Easter, boxes are cute, I must to make it :-)
ReplyDeleteThanks dear! xx
DeletePreslatke su zeke :) skidam svaku tvoju ideju i štampam :) mnogo mi se dopadaju i hvala ti što sa nama deliš tvoju kreativnost <3
ReplyDeleteHvala najlepše draga! Drago mi je da uživaš i koristiš moje ideje! xx
DeletePreslatko! Ovo ću sigurno raditi sa dječicom za vikend! Hvala ti na ideji i predlošku, draga!
ReplyDeleteHvala draga, uživajte u pravljenju kutijica! xx
DeleteExcellent post (as always)!Thank you very much :)
ReplyDeleteSresladak DIY! Moram ovo obavezno napraviti za malim bratom. Hvala na ideji. ❤
ReplyDeletexoxo
leylland.blogspot.com
Predivno! Bas sam se odusevila ovim idejama za predstojeci Uskrs <3
ReplyDelete