#DIYHome Chic Club: #DIY
Showing posts with label #DIY. Show all posts

12/16/2021

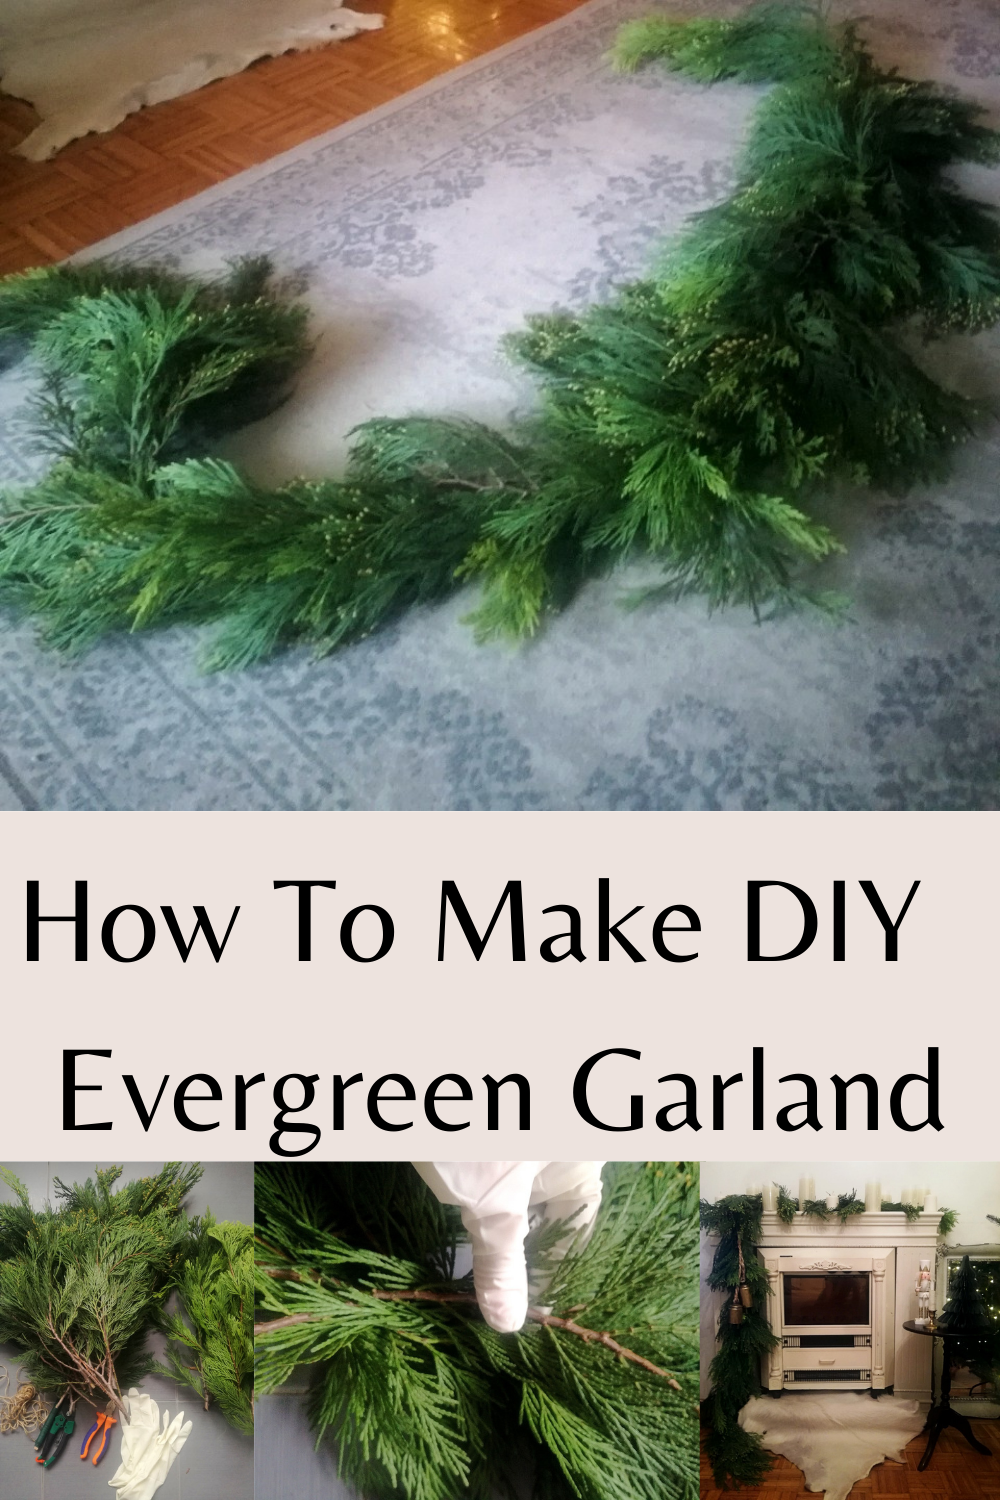
How To Make DIY Evergreen Garland / Foraged Holiday Garland DIY

There is nothing I love more than the smell of fresh pine and cedar this time of year. So I decided to make fresh garlands for my home and I wanted to share with you just how I do it. If I could and had the time I would fill our whole home with this beautiful garlands. It is so fun and honestly has been such a wonderful addition to our Christmas decor this year.
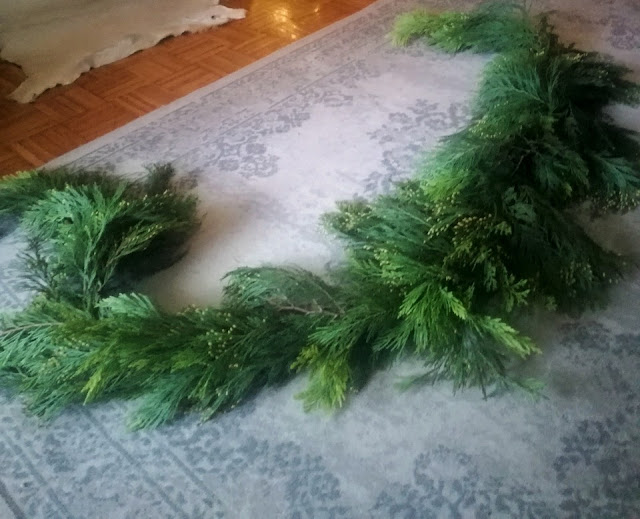
DIY Evergreen Garland
I love the free form and natural look that fresh garlands creates in the space. The easiest thing we can do with our holiday decor is to use what already exists in the nature and in fact, it is also the cheapest. I spent a total of $0 on this garland and in all honesty, this is my favorite I have ever made.
Maybe it is because it feels like home because it celebrates the nature or maybe it is because this year I finally decided to wear gloves and avoid getting sap all over my hands. Either way this year I am sharing how you too can celebrate what surrounds your home just as easily as I have.

Go for a walk and find beautiful fresh greenery

Take a basket or bag along and gather up fallen branches or even nab some if policy allows. Foraging is 100% okay but do it respectfully and save the nature.
DIY Evergreen Garland
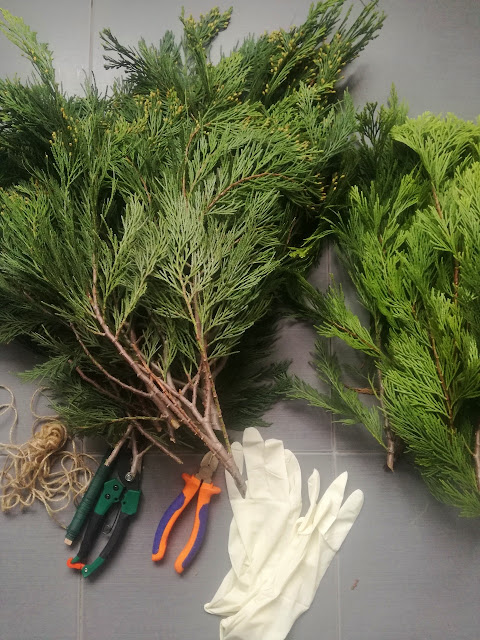
Materials Needed to make this Garland:

1. Evergreens
At least 1-3 types of greenery of your choice. I used just 2 types of cedar, incense cedar and northern white cedar but you can use as many as you like.
2. 22-gauge floral wire  
I recommend a thickness that is thick enough to work with but not so thin that it breaks easily. A green wire works well for blending in the greenery.
3. Rope or jute string
4. Cutting Pliers or Heavy Duty Scissors that can cut wire.
5. Command Hooks (you can use nails as well)
6. Gloves and old clothes help to protect you from injury and allow you to move around freely.

Now let’s start having some fun!

How to Make a Garland Step-By-Step

1. Measure:
You will want to measure the area you are creating the garland for. You can also eye-ball it , but if you are wanting to be a little more exact I highly suggest measuring the area and  adding an extra 6-12 inches.

2. Organize your greens:
I always want to see all of what I have before I start so I can make a plan. If you are planning to use 2-3 or more types of greens it`s best to organize them in sections by type so you can easily grab the piece you want to use for each bundle.
3. Choose your ends:
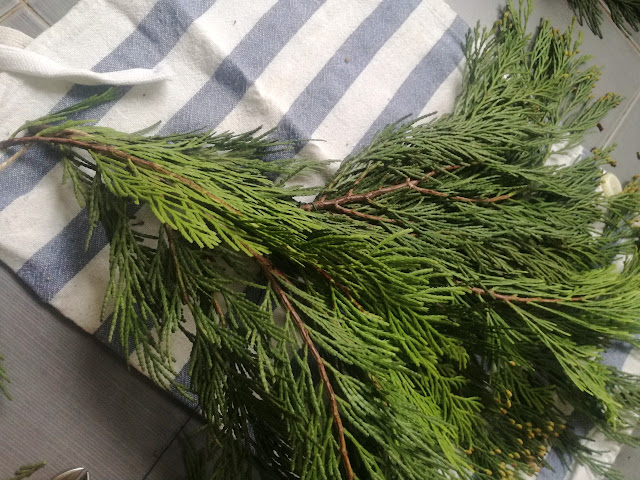
When I organize my greens, I look for the one with the proper character to end each side of the garland. For instance, I like pieces that have a perfect cascading shape to it that will close off the ends perfectly.
DIY Evergreen Garland
4. Create a small bundles to create the structure:
I always begin with small groupings of greenery to make sure I create a structure that will hold up to being hung. I loved cedar for it`a soft, feathery look, so I decided to use them, but you can use aa many variety of greens your heart desires. Usually I also use a variety of greens for some dimension and interest, but this time I used just two types of cedar. I recommend using a few different greens, they always look very beautiful and lush.

5. How to start making the garland:
DIY Evergreen Garland
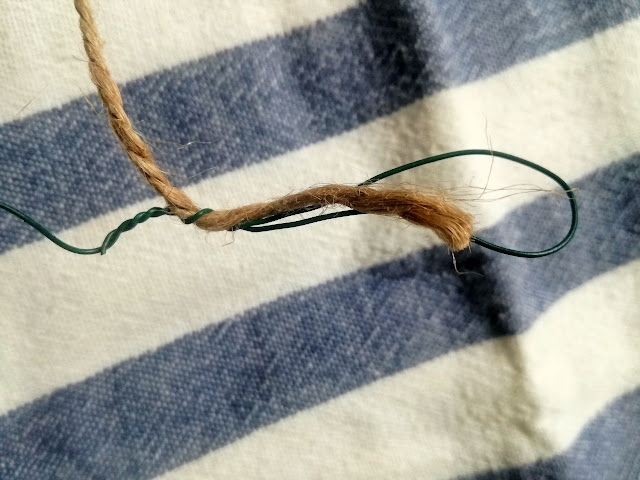
If may look complicated, but it`s not. Start by securing (wrapping) your wire to one end of the rope.  DO NOT CUT YOUR WIRE TILL THE END OF THE GARLAND!
If you want to make it a little easier to mount it, you can use the floral wire to make small loops to connect to the hooks or nails you have placed appropriately on your mantel, wall or trim. You can do this by simply making a loop and twisting the base till the loop begins fully and securely closed. 
DIY Evergreen Garland
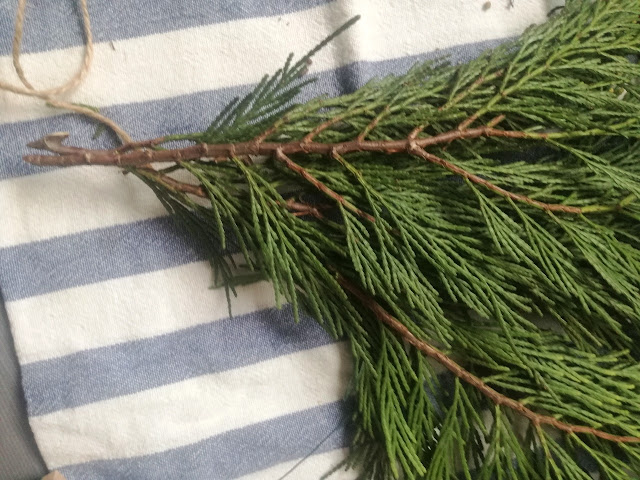
Next, place a first bundle of greens and secure it to the rope by wrapping the wire around it 2-3 times. Make sure to tightly pull your wire while doing it, because when your greens start to dry up, they will lose their volume and shrink. 
DIY Evergreen Garland
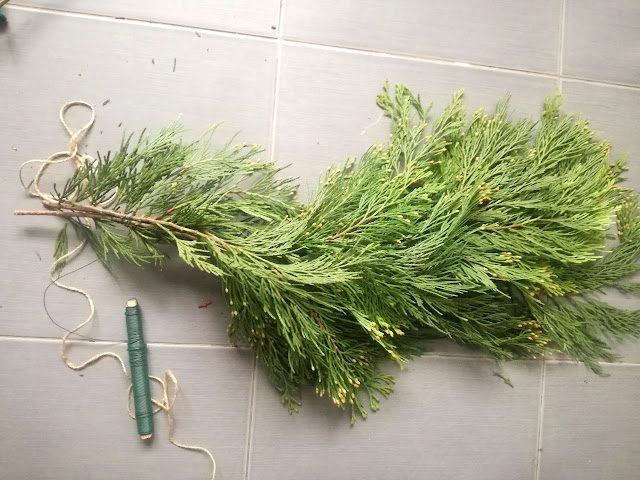
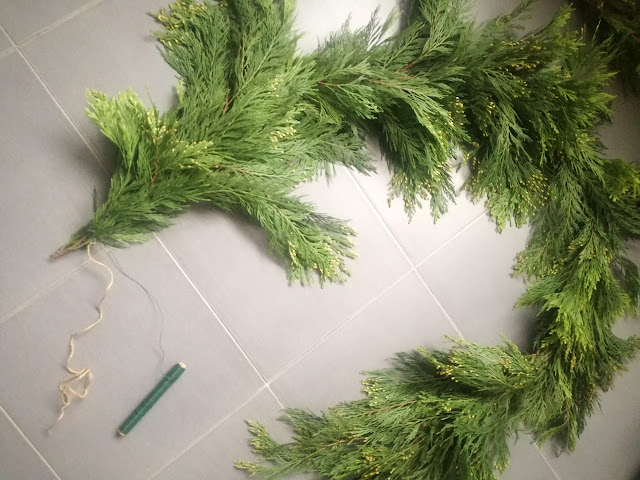
After securing your first bundle, place another one half way down and secure it with wire the same way you did before. Pay attention to placement of your bundles. Best tip to create the great look is to place your bundles strait, then left, then right, strait again, left, right etc. This way your garland will look fuller and more natural. 
DIY Evergreen Garland
Repeat this steps till the end of garland. 
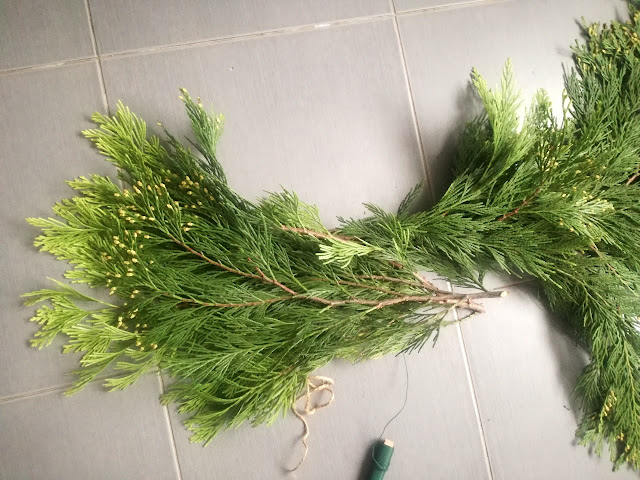
DIY Evergreen Garland
To make the end of the garland, turn the last bundle opposite and secure it with the wire. 
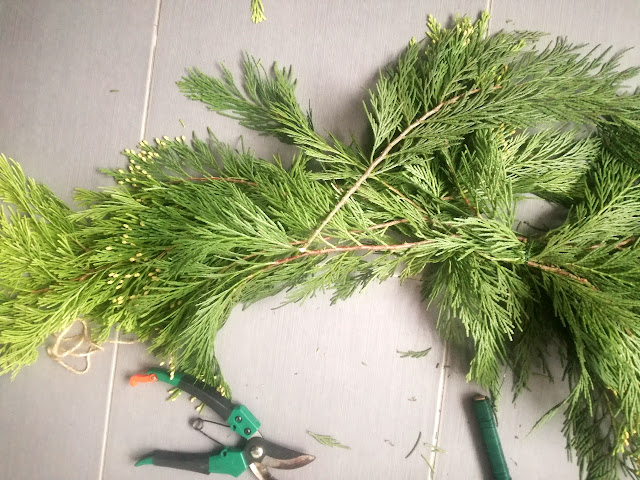
DIY Evergreen Garland
Fill in the gap with a individual branches and secure them trying to hide the wire by weaving it in between the greenery. 
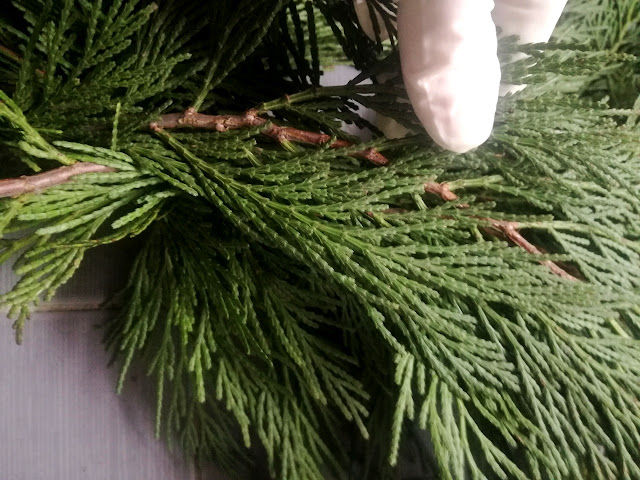
DIY Evergreen Garland
Make a second loop for hanging your garland.
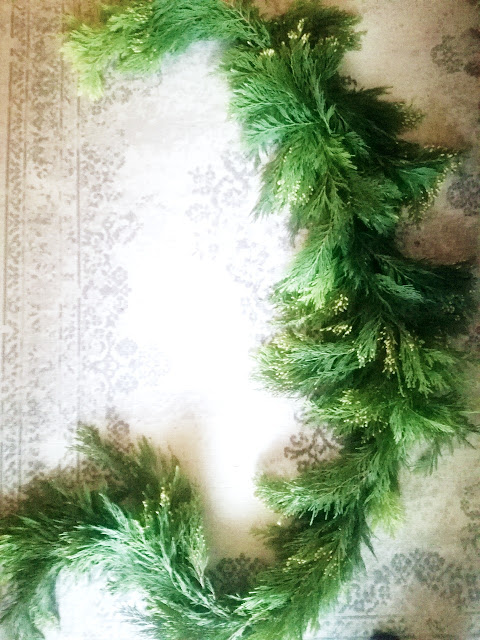
DIY Evergreen Garland
Now you should have that garland base all created! Now comes the extra fun stuff.

6. Place your garland:
If you haven’t yet, set your hooks. I highly suggest 2-3  for mantel or single doorways and 3 - 4  for double and 4-5 for triple width doorways. 
Once you have the hooks where you want them, attach the garland by the loops you created.

7. Fill in the Gaps:
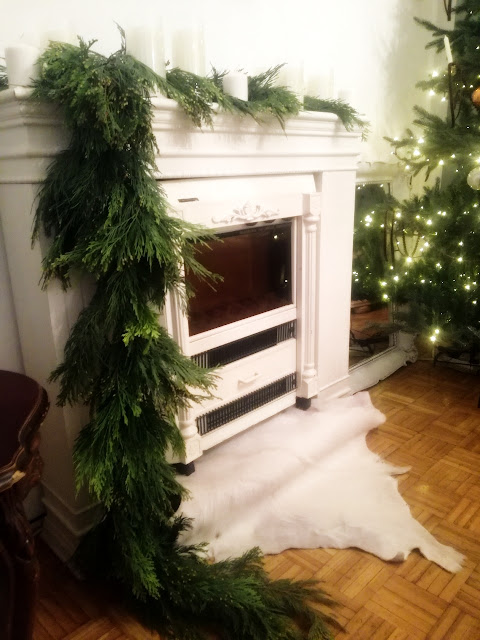
DIY Evergreen Garland
This is the part to make your garland perfect. Now is the time for all the extra pieces you have left. You can use the structure of the garland to place various greens into the garland. You can use all different types and letting them add depth to the garland. You can decide when it is finished for you. I typically work on mine throughout the week as I look at it and find some imperfections. 

Bonus tip: Olive Oil helps to remove the sap on your hands after you complete the garland, if you decide not to wear the gloves. Just place some olive oil and soap on your hands and scrub under hot water to remove the sticky feeling.
That is all it takes to make your own garland for your home this holiday season. If you have any questions or any other tips feel free to leave them below! I would love to hear and to answer. Happy Holidays! 

DIY Evergreen Garland/PIN ME

Follow me on Pinterest HERE  
Find my Free Printables HERE
_____________
Keep in touch!
Love FREE PRINTABLE?
Sign up for my email subscriber list and get your FREE
Daily and Weekly To Do List, Free Fitness Planner Printable;
The Ultimate Packing List
and much more to come!
Subscribers Only!

2/16/2021

5 Tips To Create Focal Point In A Room With Art /Photowall

Every room needs a focal point — it’s a basic design principle. Your eye needs somewhere to land, and a focal point draws you into a room. Making the focal point with art from Photowall is a great way to do it. 

You don`t know how to you create focal point in your space and have no idea where to start? I’ve got some ideas and 5 easy tips to create focal point in your space. 

1.Look at Your Architecture of the room

The architecture of many rooms may already designate a specific focal point which is a huge help. Mantels, french doors or a large bank of windows can be a great start, and you won’t have to work so hard while decorating. Simply use the existing architecture and build from there.

In my living room, the fireplace is the focal point which I emphasized even more by adding a oversized painting. This beautiful piece comes from Photowall. If you are regular on the blog, you`ll remember my previous post about them. Photowall is a perfect place to find beautiful wallpaper and wall art (wall murals, canvas prints and posters). So, If you`re looking for any of these, be sure to check them out, they have a huge selection of motifs in any category you can possibly imagine.
2.Use Height

If you, like me, don’t have existing architecture in your space that creates a defined focal, create one with height. A large bookcase is a good choice, but I also love pairing a mantel with a big piece of art. Hung over a fireplace, this art piece adds height, drawing your eye in.
3. Go Oversize

Any type of wall art can be a great way to turn a simple space into the dramatic focus in your room. I love my new art piece because it demands attention. It`s big and bold and really makes a statement in the room, just like I need. Don`t be afraid to choose a big art piece, mine is 100 cmx100 cm  and looks perfect over the mantel. Great thing about Photowall is that they can make canvas prints (or posters and framed prints) in almost any size you need. 
4.Bold Color

If you have a small space, using one bold color can bring in that drama and interest you’ll need. As I mentioned before, Photowall has a huge selection of art, both in black and white and color. I decided to use this beautiful black and white canvas print "In Bloom II" by the artist Fran Rodríguez (@lacabezaenlasnubes). 

5.Silhouette Your Piece

In my living room, I used a dark wall art to accentuate my white walls and neutral furniture pieces and add drama in my space. You could use the same method with white and light colored art on a dark wall, or a bold, colorful art with neutral pieces. Great way to create a focal point with art is through the use of contrast. Contrast refers to difference. Any type of difference in imagery will result in that element becoming a focal point.

If you`re looking to make a focal point and make a statement in your home with art, be sure to visit Photowall. Also, I  want to let you know that your order will come very fast and carefully packed in a durable cardboard box. Inside the box you will find everything you need for easy assemble. People in Photowall are very cooperative and nice, they will help you with anything you need. On their site you will also find the assembly video. It`s very helpful and easy to follow. 
Copyright Home Chic Club 2021. Files may be used for personal use only. No commercial use of the file is available. Files may not be directly shared within Facebook groups, on websites or in any other way. A link to the web page to download the files may be shared as well as one photo. The file may not be printed and then sold. The images may not be used in any way other than to share with a link to the original web page.
Follow me on Pinterest HERE  
Find more Interior Design Ideas HERE
_____________
Keep in touch!
Love FREE PRINTABLE?
Sign up for my email subscriber list and get your FREE
Daily and Weekly To Do List, Free Fitness Planner Printable;
The Ultimate Packing List
and much more to come!
Subscribers Only!
Sharing on:

4/09/2020

Free Easter Printable Placemats

We’re just days away from Easter now, but there’s still time to do a little more prepping before the big rush! Today, we’re talking dining rooms, and I have a special gift for you for your holiday tables! I’ve designed a free printable place mats for your Easter table!


The place mats are designed to be printed on A4 card stock. You can also print it on a regular printing paper and laminate it. It will be much more durable and you can use it over and over again. If you do not have access to a printer, you can take or send the file to your local office supply or copy store and have them printed.
I’m using them on my Easter table this year for my family, (sadly we can`t have guests this year) and it’s a way to dress up a table quickly and easily! Layer them over a tablecloth, or place them on a bare table to add an easy element of design!

I hope you enjoy these and I hope it gives you a little inspiration for your tablescape! Be sure to check my other Easter ideas, crafts and printables! I`m sharing so many great ideas you can easily recreate at home. 

Please find your free copy of my FREE EASTER PLACEMATS for you to download at the end of the post. Thank you for your continued support and feedback on my blog and on social media, I really appreciate it! If you find my EASTER PLACEMATS helpful, please let me know in the comments and share with your friends. Thanks for joining me today and stay safe! Much love!
Follow me on Pinterest HERE
Find more Easter Ideas HERE 
Find more Free Printables HERE
_____________
Keep in touch!
Love FREE PRINTABLES?
Sign up for my email subscriber list and get your FREE
Daily and Weekly To Do List, Free Fitness Planner Printable;
The Ultimate Packing List
and much more to come!
Subscribers Only!

2/11/2019

DIY Bath Bombs - Valentine`s Day Gift + Printable

With the Valentine`s Day just around the corner it is time to start focusing on gift giving. We all want to give beautiful and meaningful gifts at Valentine`s Day, but all too often they can break the bank. What if I could show you how to make a dozen natural bath gifts for free?! You know me, I am a person that loves to creative DIY gifts for the holidays and stay on a budget. So, these are prefect, because they are quick and easy to make, and all the ingredients  you probably already have at home. Maybe you’ll have to scrounge a couple of items you probably don’t normally have in your cupboard at home (e.g. citric acid – the stuff that makes them fizz!). 
As I mentioned, they make fantastic gifts – they’re inexpensive and much appreciated! Wrap a few up in a cellophane bag and tie it with some nice ribbon and ta-da!

Once you get the hang of it, you will want them in your bathroom all the time, so you can make double batches all at once and have your DIY bath bombs ready for weeks’ or months’ worth of luxurious tub soaks. Nice!!

What you’ll need:
1 cup of baking soda
1/2 cup of citric acid
1/2 cup of corn starch
2 tsp of essential oil
5 teaspoons of water
food or soap color 
a bath bomb mold or cake mold
What you do:
1. Whisk all the dry ingredients together in a medium-sized bowl - make sure there is no lumps.
2. Add a essential oil and color in the water and whisk together. 
3. Now comes the tricky part, when you can ruin everything. Here`s what to do. Add just a few drops at the time and whisk vigorously to stop the fizzing. Repeat until all the liquid is used.
You should end up with the mixture a bit more damp to be able to press them into the molds. To make sure you have the right consistency, press the mixture in your hand first. It should stay compact like in the photo below. Throw this ball back in the bowl, it should stay compact. If it`s falling apart, add a little bit more liquid. 
4. Spoon some mix into the heart shaped mold (it`s for Valentine`s day after all) – enough to fill it about 1/3 – 1/2 way. With your fingers press the mixture hard into the bottom of the mold AND PRESS PRESS PRESS! You want the mold packed as tightly as you possibly can so the bath bomb is easier to remove and doesn’t fall apart easily after you’ve removed it or in the process of removal. Layer more mixture onto the packed down stuff and repeat, pressing as hard as you can. You will get the feel of it and the process will speed up. Repeat with the other molds.
5. Pop ‘em out! I find it works well for my mold if I turn it over onto a flat surface covered with a towel (but it also works just fine without it). I bend the pan a little bit and tap the top of the mold with the spoon until they fall out.
6. Now you need to let them dry. I’ve experimented with how long this actually takes, and I left them overnight. (I put them under my radiator), or you can put them in your fridge for at least 1 hour.  This step will depend a bit on your climate – if you live in a more humid climate you might want to store them somewhere like a closet to protect them a bit from the humidity while they dry.
And their you have it! Your cheap and fancy new DIY bath bombs can be used right away or stored for several months. 


For the once you make for yourself, (because you will likely be storing them in a humid bathroom), I recommend placing them in a sealed jar or use a large pickle jar with a tight lid.
If you are giving them as a gift, wrap them in a cellophane and tie a cute bow. Add a card or a love message and you are done! I have a cute Valentine`s day gift tag free printable for you below. Just click on the link and download them. You can use them together - front and back or separately, however you want. 


Happy Valentine`s bath time!!

Follow me on Pinterest HERE.
Find more Valentine`s Day Ideas HERE.
Find more Free Printables HERE.
______________
keep in touch!
Love FREE printables? 
Sign up for my email subscriber list and get your free 
Daily and Weekly To Do List, Free Fitness Planner Printable, 
The Ultimate Packing List
and much more to come.
Subscribers Only!
free daily and weekly to do pages