#božićne dekoracijeHome Chic Club: #božićne dekoracije
Showing posts with label #božićne dekoracije. Show all posts

12/23/2016

How To Make a Fresh Christmas Wreath - DIY

Hello sweet friends! I hope you had a beautiful week. If you are new here, a warm welcome to you. As I mentioned in my Christmas Home Tour - part 2 (find it here) in this festive DIY you will learn how to make this fresh wreath that is guaranteed to get compliments.

TOOLS USED:
Wreath ring
Fresh evergreens
Wire
Wire cutters
Scissors
Ribbon
Baubles or other decorations
Picks and sprays

Zdravo dragi moji! Nadam se da vam je protekla nedelja bila lepa i uspešna. Ako ste prvi put na mom blogu, želim vam toplu dobrodošlicu.
Kao što sam pomenula u prazničnoj turi mog doma - drugi deo (pogledajte ovde), u ovom prazničnom DIY projektu ću vam pokazati kako da napravite ovaj sveži venčić i zadivite svoje ukućane i goste.

MATERIJAL:
Obruč za venac
Sveže zimzelene grane
Žica
Klešta za sečenje
Makaze
Ukrasna traka
Kugle ili drugi ukrasi
Ukrasne grančice
Tutorial:
First cut all big brunches into a smaller pieces and sort them in groups.
Tutorijal:
Prvo sve veće grane isecite tako da dobijete male grančice i složite u grupe po vrsti.
Then, using a few of each make a small bundle.
Kombinujte nekoliko vrsta i formirajte manje snopove.
Secure it with a wire on a wreath ring.
Učvrstite ih na osnovu venca pomoću žice. 
Keep adding bundles, but make sure to put next one on top of the previous, so you can hide the ends and the wire. 
Nastavite da dodajete formirane snopove jedan do drugog,  pazeći da svaki sledeći pokrije deo prethodnog za oko 2/3. Na taj način ćete prikriti deo na kome se vidi završetak sa žicom.
Once you make a full circle secure the wire on the back.
Nakon što ste ovako napravili čitav krug od zelenila, učvrstite žicu na poleđini venca.
Now we can start to decorate. First add picks and sprays. I added this one with a faux snow and little pine cones. 
Vreme je za dekorisanje. Prvo dodajte ukrasne grančice. Ja sam odabrala ove snežne sa malim šišarkama.
Then I added silver once to give it a little sparkle.  
A potom i srebrne, za svetlucavi efekat.
Then you can add any decorations you like, baubles, fruits, flowers... Use wire or a glue gun to secure it in place.
Potom dodajte dekorativne detalje po želji, kao što su kuglice, voće, cveće... Pričvrstite ih žicom ili vrućim lepkom.
Finally, add a decorative ribbon and you`re done! It took me only about half an hour to make it. If you sprinkle it with water daily, it will last you very long! Fresh wreath like this look beautiful and your house will smell like Christmas!
From my family to yours, I’d like to wish you a very Marry Christmas and a very Happy Holidays!
Poslednji korak je da dodate ukrasnu traku i venac je gotov! Za ovaj venac mi je bilo potrebno oko pola sata, zaista je brzo i jednostavno. Savet: Prskajte venac svakoga dana vodom, tako će vam trajati mnogo duže.  Ja najviše volim ovakve venčiće od svežeg zelenila jer deluju mnogo lepše i šire divan, praznični miris u domu.
Naposletku, želim da vama i vašoj porodici poželim srećne i nezaboravne Novogodišnje i Božićne praznike! 
Create stunning home for less! Get FREE tips right to your inbox! 
Send Me My Tips! 
Your Email:


12/19/2016

All is Bright - Christmas Home Tour - Part 2

Hello sweet friends and welcome to part 2 of our home tour. If you missed the part 1 you can find it here.
I hope you had a beautiful weekend. If you are new here, a warm welcome to you. This little space of mine is where I share my love for creating, art and design. Today I`m sharing my kitchen and dining room. So please…come on in.
We haven’t had too much snow around here as yet. That’s changed today with the first snow of the season. A little, but it`s still the snow. I’m hopeful we’ll have more for Christmas.
As you can see I haven`t overly decorated the kitchen, because we love to cook and bake on a daily bases, so I just added some holiday mugs and dishes and a cloche full of ornaments. Of course, we have some cookies, galettes and a Christmas chocolate pretzel wreaths (delicious and so easy to make). 
On the shelves I added a cute little red car with a Christmas tree and a fresh greenery. Also I put a fresh swag on my hood. Love the smell of fresh evergreens in the kitchen.
On the other side I have a cute little vignette with houses and bottle brush trees.
Now onto our first Christmas tree which I put in a champagne bucket this year. Behind is my DIY cotton pom pom garland (you can find more here), white ornament garland and cute stockings with gifts. Underneath the tree is a few more gifts.
This year I decided to use red and teal blue on the tree with white, of course. 
This flocked tree is adorned with little houses, bells, hearts, berries...
birds, stars and pine cones.
On the left is my vintage secretary which I use to store my little collection of blue china. On top of it, I places more fresh greenery and a vase full of ornaments.
Now on to my second Christmas tree. Really small and cute tree in a wicker basket. 
Next to the tree is a little snowy cottage with some bottle brush trees on a cake stand.
That lead us right to our dining room. 
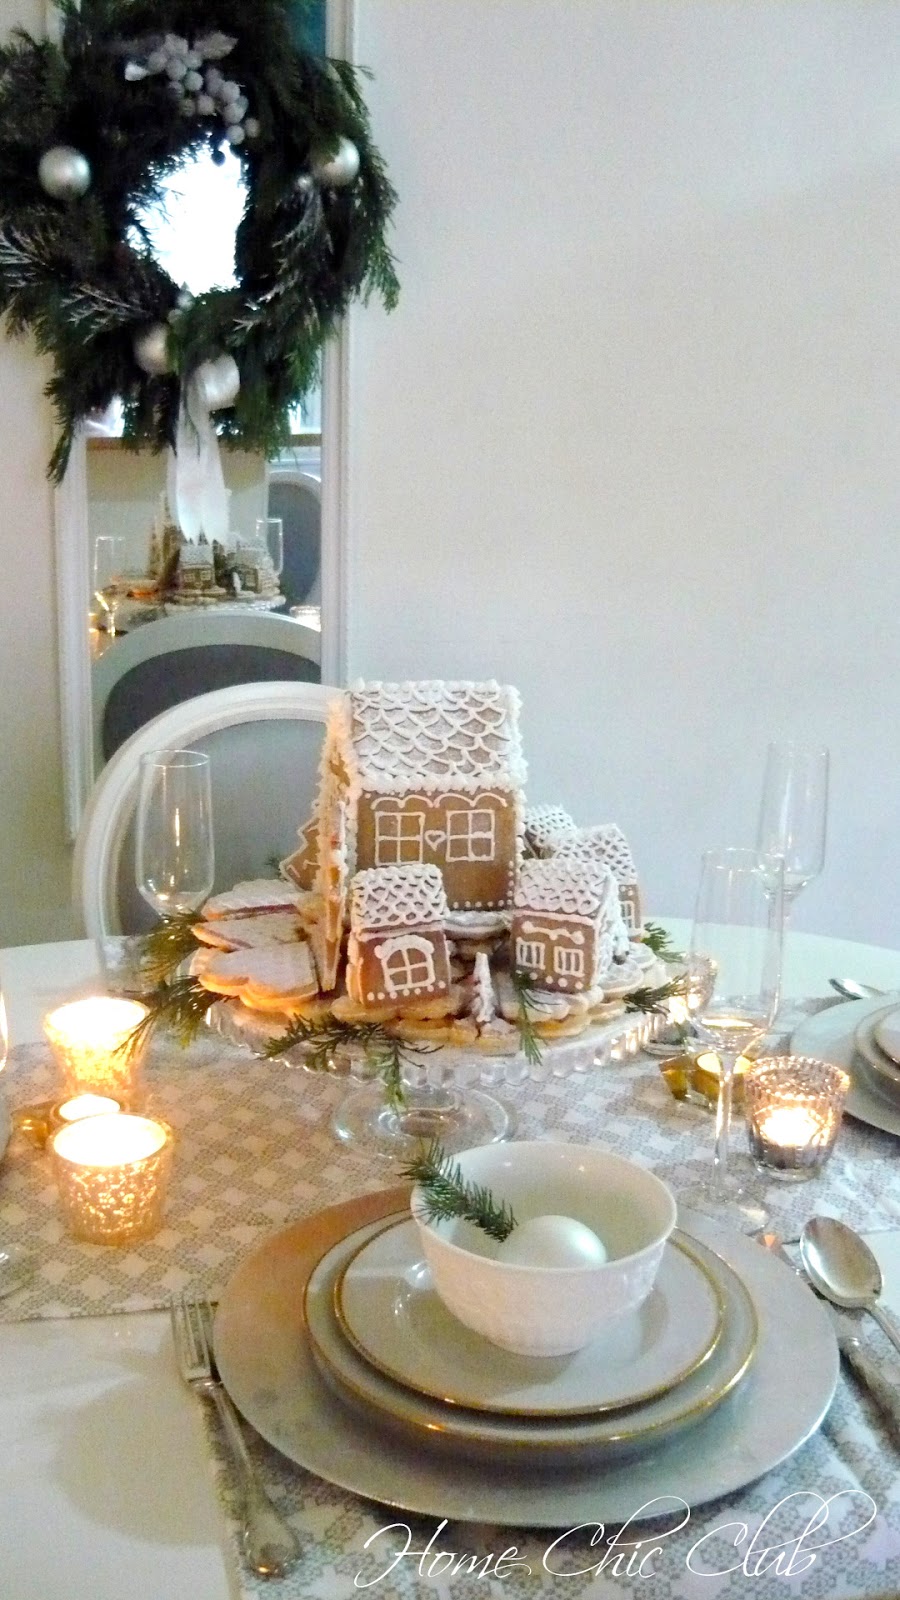
Real treat and a centerpiece for our table this year is this lovely gingerbread village I make the other day. I made five smaller and one bigger house, few Christmas trees and put them on a cake stand. Underneath the gingerbread houses is galettes as a base for my village. I dust everything with a powder sugar for snowy effect. 
On the table I used two table runners, silver chargers and my favorite white and gold plates, white bowls, vintage silver cutlery and candlesticks. 
On the mirror is my DIY fresh wreath (I will share tutorial on Thursday). Chandelier also has some new crystals and a few glass ornaments.
Small wreaths on the chairs makes us and our guests feel very special. 
I really enjoy looking at twinkling lights on our Christmas tree in the mirror while eating dinner. So festive!

So there you have it…our little home, all dressed up for Christmas. I hope you enjoyed our tour and you were able to find some inspiration. And please remember, what’s most important about your holidays is not the beautiful home, but the memories you are making with your family and friends.
From my family to yours, I’d like to wish you a very Marry Christmas and a very Happy Holidays!

Create stunning home for less! Get FREE tips right to your inbox! 
Send Me My Tips! 
Your Email: