#farmhouseHome Chic Club: #farmhouse
Showing posts with label #farmhouse. Show all posts

6/18/2018

How To Discover Your Interior Design Style


 7 Most popular interior design styles
Hi darlings, today`s post is all about interior design styles and how to discover yours the easy way. 
Sometimes it is very difficult to determinate what`s your style and how to chose things for your home that will show it off the best possible way. So, today I`m choosing just the 7 most popular interior design styles at the moment and hope you`ll recognize which one represents you. If you don`t have a clue which one is yours, it is a good idea to look around your home and find out things and decor you love. They most likely represents one of the styles which will definitely help. Another great idea is to go over on Pinterest, create a new board and pin all the things you like. You can check it later and see if anything is ripeting, like colors, furniture, decor etc.

Now back on the most popular styles! Here they are:
Bohemian style
1. BOHEMIAN
It`s a colorful and carefree style. To look absolutely perfect, the goal is to make it imperfect - a beautiful, purposely mess. That can be achieved by adding a rich colors and natural fibers (jute, linen, burlap), poufs with a lot of embellishments (like tassels and beads), mixing and layering different rugs, adding decorative pieces from around the world and, of course a colorful pillows and lots of plants everywhere.
Mid Century Modern style
2.MID-CENTURY MODERN
It`s a style with a lots of neutrals, minimalist silhouettes and natural materials like wood and linen. Furniture often has a geometric lines and has a vibe of a specific time period which is around 1950. Furniture is very functional, but often on a smaller scale and floor plans are open and airy. This style places a big focus on a lighting, very modern, elegant and sleek, especially on floor and side table lamps.
Contemporary style
3. CONTEMPORARY
This style is known as style with lots of neutrals and simple furniture in natural fabrics like linen or silk. To bring some interest in a rather simple picture, it`s the best to use color block method with a rugs or art on the walls. Materials to use are stone, glass or metal, lots of geometric patterns, modern accessories and white walls. 
Farmhouse style
4. FARMHOUSE
Very popular these days is a farmhouse style with a lot of character and charm. Practical and handy, but sophisticated, this style become extremely popular after the HGTV`s Fixer Upper with Chip and Joanna Gaines. It combines vintage finds with newer pieces, iron and wood and, of course, shiplap. This style is ideal if you like a DIY projects or upcycling the old pieces. For accessorise use vintage boxes, pitchers, vintage wooden signs and galvanized dekor.
Minimalism style
5. MINIMALISM
Also very popular these day, this style takes modern one step further. If you like very clean space without a lot of stuff and embellishments all over the place, them minimalism is most likely your style. Minimalist have only the furniture and accessories they absolutely need and really appreciate the open and clutter free space. For decoration use the one big piece of art or use a functional pieces, like lamps. Color palette is gray, pastels and different shades of white.
Traditional style
6. TRADITIONAL
This style is very calm and warm and inviting. Lots of wood, peaches, greens, and gold or bronze are the color palette to go. Floral or paisley patterns are very popular, but also striped and plaid fabrics. These patterned fabrics are very often on drapes or pillows or even rugs. Furniture are regal and heavy with lots of curves or embellishments on the wood, and often slipcovered. This style also features a big libraries, crystal chandeliers, mirrors, sconces and intricate design on doors, windows or staircases. 
Coastal style
7. COASTAL
For those who can`t live without a beach and want to bring it to the home, their style is most definitely coastal. Space is light and airy with a lot of send shades, bright white and blue, often in striped form. Fabrics are natural, like linen or seagrass, wicker and wood details are a must. Accessories are beach related, like sea shells, rope, boats, navigational maps etc. Space is always light and bright, with a big windows and shear curtains.
I really hope this was helpful and you are now able to find your design style, so you can start decorating your dream home. 

I would love to hear what`s your style, so let me know in the comments.
7 Most Popular Interior Design Styles

P I N  T H I S  F O R  L A T E R!!
Follow me on Pinterest HERE.
Find more Interior design inspiration HERE.
_______________
keep in touch!
Love FREE printables? 
Sign up for my email subscriber list and get your free 
Daily and Weekly To Do List, Free Fitness Planner Printable, 
The Ultimate Packing List
and much more to come.
Subscribers Only!
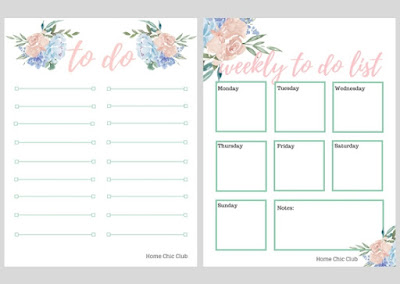
free daily and weekly to do pages

10/17/2017

DIY Easy Farmhouse Sign

Today I`m going to make DIY farmhouse sign for my kitchen and show you how easily you can do it too. Farmhouse style is everywhere lately and everyone loves it, so let`s go and start with this simple and easy DIY project. 
All it takes is wood planks, a bit of paint, and a printer and you can pretty much make any kind of farmhouse sign you'd like cheaply and easily. 
We were happy to have pile of reclaimed wood in our cottage. Maybe some would call it junk, but I call it treasure! Love, love, love the weathered look on this piece of wood! It was in the sun, rain and snow for years and turned in farmhouse beauty... The other one is a scrap piece of wood, left over from another project. 
If you want to see how easy is to them this into cute farmhouse signs, just keep reading...
Materials used:
Wood plank (size of your choice)
Paint
Paint brush
Computer printer
Printing paper
Tape
Sander or sandpaper
Clear varnish
Hanging kit

Tutorial:
You can choose to leave your wood raw or paint - stain it in color of your choice. Anyhow, sand and wipe down your wood planks first. One plank was darker and weathered and the other one was brand new. I decided to give them both just a light white wash. I thought that a combination of raw wood and a little bit of white wash would be pretty in our kitchen.
To create the letters, I made my own stencils by printing the letters I needed on paper. You can just use Microsoft Word (like I do) or PicMonkey or Canva to design your words or letters on a page to print.
After your prints are done, take a pen and trace (scribble) the back of each letter.
You will want to make sure that the letters are fully saturated (if you`re having hard time to see your letters, place the print on the window and than you can see the letters through the back layer of paper).
Once you have each letter traced, cut off all excess paper. Now, it is time to figure out spacing. Lay out all of your letter across the board and tape them in place. For this technique you must tape them down or your letters will get messed up.
Now, take your pen and go over the outline of each letter. Check if there`s marks on the board once in a while and correct if needed. 
Once you have your letters outlined on the board, remove the paper, take your sharpie and go over the outline of the letters. Do not worry about the outline being bold, we will distress it later.
Now it is time to paint! Using the acrylic craft paint fill in the outlined letters. I again just did one coat as to not make the lettering too bold.
After you have traced and colored in all letters, allow sign to dry.
After the piece is dry take the sandpaper and gently go over the sign distressing it in some areas and dulling the words in others. This was my favorite part! Once your sanding is complete take your wet rag and gently wipe off your farmhouse sign. 
Last, finish with a coat of clear varnish, add hooks for hanging  and your new sign is ready to go on the wall. So stinking easy and cool!
Now, let`s take a look of them in my kitchen...
What do you think? Are you going to try this easy DIY farmhouse decor?
Follow me on Pinterest HERE.
Find more DIY Projects HERE.
______________
Keep in touch!
Love FREE printables? 
Sign up for my email subscriber list and get your free 
Daily and Weekly To Do List, Free Fitness Planner Printable, 
The Ultimate Packing List
and much more to come.
Subscribers Only!
free daily and weekly to do pages

8/31/2017

Easy Fall Ideas - DIY Fabric Pumpkins

Looking for an easy DIY #fall project? Look no further! Here’s a cute and easy way to make fabric pumpkins and decorate your home for the season. Best thing about this project: it can be made of new or old fabric or even a old clothing! 
As I said in this post, I use fabric pumpkins in my fall decor every year, but I just realized I never shared how to make them! And they are so fun to make!
Would you like to make some fabric pumpkins too? It’s so easy and you don’t even need a sewing machine!
P.S. If you want to see how I made this cute storage box you can find the tutorial here
Materials:
Fabric
Pillow stuffing
needle and thread
hot glue
scissors/ruler
Something for the stem (I used sticks I found outside)  and leaves (if you even want a leaf, I don`t...) 
Twine, string or yarn to wrap around the pumpkin.

Tutorial:
Cut your fabric into a rectangle, different dimensions will give different size.  A standard pumpkin shape would be width = 2 times the height. I wanted various shapes that would complement each other.

Fold your fabric in half, right sides together and hand sew, machine sew or even hot glue the side seam. (I used old pants for this one- perfect that I didn’t have to do an ounce of prep work to it!;D)
Next, sew a wide basting stitch along the bottom of the tube. Gather the bottom up so it is tightly closed and sew a few stitches to secure the bottom.
 It should look something like this.
Flip the fabric right side out and stuff your pumpkin. (Tip: to save stuffing, make a hole in the middle and use plastic bags, then put stuffing around, on top and bottom.)
Sew a basting stitch along the top and close it the same way as the bottom.
Pull the top closed and add a few stitches to secure it.
Thread the needle through the entire length of pumpkin (top to bottom) and wrap the twine/string around the pumpkin 4 to 8 times (whatever looks best to you.) Wrap it tightly and tie it off on the bottom. The tension gives the pumpkin the puffiness and better shape. 
Add a small amount of hot glue on top of your stem and attach it on the pumpkin.
If you want, add your leaves with a little more hot glue and voilà! A really cute pumpkin! Easy isn’t it?
Now go make a few! Even a no sewer can easily stitch up this pumpkin patch, made of linen, silk, or velvet. Set the sewn pumpkins in a cool autumnal scene and enjoy your good work! 
Do you have any fun fall projects on your list?

Thank you so much for stopping by, wishing you a wonderful day!

Follow me on Pinterest HERE.
Find more DIY Projects HERE.
Find Free Printables HERE.
______________
Keep in touch!
Love FREE printables? 
Sign up for my email subscriber list and get your free 
Daily and Weekly To Do List, Free Fitness Planner Printable, 
The Ultimate Packing List
and much more to come.
Subscribers Only!

free daily and weekly to do pages
Featured on: