#glutenfreedessertsHome Chic Club: #glutenfreedesserts
Showing posts with label #glutenfreedesserts. Show all posts

1/29/2020

Flourless Chocolate Walnut Cookies/ Gluten Free

These flourless, gluten free walnut cookies are the treat you will want to make over and over again. Their thin, crackly shell and fudge-browne middle with toasted walnuts are just the match made in heaven!
Chocolate Walnut Cookies/ Gluten Free
This story begins in 1997 when François Payard, a third generation French Pastry Chef born in Nice, opened his first patisserie in Manhattan and decided to create a new type of cookies. His idea was to use popular macarons as an inspiration to add a twist on a most popular American dessert, cookies. The result was this over the top, cranchy, jet melt in your mouth chocolate walnut cookie. 
When you look at the recipe, you will notice it`s just a few simple ingredients, but the final result is totally unexpected and OMG delicious! So gooood! Crispy, fudge, chocolat-y and delightful. You just NEED to try them out. 
Great thing about this recipe is that you`ll need just 5 minutes for prep and 15 min. for baking. You can finish them from start to finish in just 20 minutes, because this cookies doesn`t need to stay in a fridge for a few hours like others. They goes to oven right away!
Chocolate Walnut Cookies/ Gluten Free

Prep Time: 5 minutes Cook Time: 14-16 minutes Yield: 12 big cookies
INGREDIENTS
2 3/4 cups (280 g) walnuts
3 cups (350 g) confectioners sugar
1/2 cup + 3 tablespoons (70 g) Dutch-processed cocoa powder (or good quality cocoa)
1/4 teaspoon salt
4 large egg whites (room temperature)
1 tablespoon vanilla extract

Chocolate Walnut Cookies/ Gluten Free
INSTRUCTIONS
- Before you start making this flourless walnut cookies, toast the walnuts in the preheated oven on 350°F(175°C) for about 6-9 min., or until they turn golden and smell toasty. Let them cool, then coarsely chop them. 
- Prepare (line with parchment paper) 2 large baking sheets and set aside. 
- In a large bowl combine walnuts, sugar, cocoa and salt and mix until well combined (you can use stand or hand mixer). In a separate bowl wish egg whites with a fork until they look just frothy. Add vanilla and mix again to combine. While the mixer is running, add it to the dry ingredients and mix for about 30 sec, or until it`s just combined and thicken a little. 
- Using a large spoon or 1/4 measuring cup, skoop the mixture on a baking sheet, spacing them 2-3 inches apart (5-7 cm). Put them in the oven and low the temperature to 325°F(165°C) and bake for about 14-16 min., or until the tops become glossy and cracked. Remove (with a paper) to cooling rack and cool completely. Store in a airtight container at room temperature.

Chocolate Walnut Cookies/ Gluten Free
They are beautiful inside and out and taste like a piece of heaven! I strongly suggest you to give them a try! If you do, don`t forget to let me know what you think!
Get your printable recipe HERE
Chocolate Walnut Cookies/ Gluten Free/Recipe

Did you found this post useful, inspiring? Save THIS PIN to your Recipe Board on Pinterest 😊
Chocolate Walnut Cookies/ Gluten Free
Follow me on Pinterest HERE  
Find Free Printables HERE
_____________
Keep in touch!
Love FREE PRINTABLES?
Sign up for my email subscriber list and get your FREE
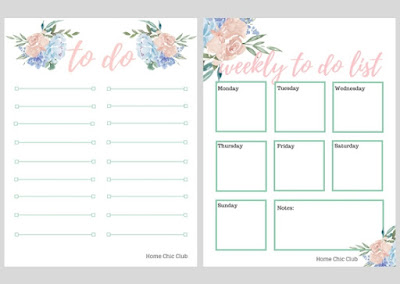
Daily and Weekly To Do List, Free Fitness Planner Printable;
The Ultimate Packing List
and much more to come!
Subscribers Only!
free daily and weekly to do pages

1/22/2020

Healthy Vegan & Gluten Free Bounty Bars

Vegan and Gluten Free, these Healthy "Bounty" Bars will blow your mind! Made with only 5 plant based ingredients, they’re so quick and easy to make and you`re going to love them!
Looks like I`m on a mission here, hahaha... As I mentioned in my previous post, where I shared my beautiful vegan and gluten free "Snickers" bars, I`m trying to incorporate as many great vegan and gluten free sweets as I can in our family manu. This is my turn on this beautiful bars and it`s a home run!! I mean, they are so similar to a actual Bounty bars, you can hardly find the difference. They are moist, creamy and delicious.With that crunchy chocolate on top, just perfect. My son tell me they are even better than a real thing!! Wow! Time for my happy dens!! 💃 
Great thing about this recipe is that you`ll need just 5 minutes of your time and a food processor to make them. Of course, you need also time to melt to chocolate, but seriously this is one of the easiest and quickest desserts on Earth!!

Prep Time: 5 minutes Cook Time: 60 minutes (in refrigerator) Yield: 19 mini bars
INGREDIENTS
For the filling:
150 gr.unsweetened dessicated coconut
5 tablespoons agave or maple syrup (you can also use honey)
5 tablespoons virgin coconut oil
1 teaspoon vanilla extract
pinch of salt
For the chocolate glaze:
150 gr. vegan chocolate
1 teaspoon virgin coconut oil

INSTRUCTIONS
In a food processor combine 150 gr. dessicated coconut, 5 tablespoons agave or maple syrup (you can also use honey), 5 tablespoons coconut oil, 1 teaspoon vanilla extract and a pinch of salt. Mix until everything is well combined. Note: this mixture may look like very soft and moist, but don`t add be attempted to add more coconut - mixture will harden after cooling. Very carefully shape a little bars and put them on a tray or plate. I found that the easiest way to shape them is to use 1 tablespoon of a mixture, squeeze it in a palm of my hand, then lightly shape it into a bar. Put finished bars in a fridge or freezer for an hour or until harden.
For the glaze, cut chocolate in a small pieces, put it in a glass bowl and melt over bain marie (double boiler) or in a microwave. Add the coconut oil and stir to combine. Place 1 bar into a bowl of melted chocolate and coat it on all sides. Remove it from the chocolate with a fork and let any excess chocolate to drip off. Place your bar on a backing sheet lined with a parchment paper. Repeat with the remaining bars. Worst part is you`ll have to let them cool (first on a room temperature, then in a refrigerator). After that, it`s time to enjoy and share.
You can store them in a fridge up to a 10 days, or in a freezer up to a month. If you try them, let me know what you think in a comment section and don`t forget to share! Thanks!
If you want to print this recipe, just click HERE.


Follow me on Pinterest HERE  
Find Free Printables HERE
_____________
Keep in touch!
Love FREE PRINTABLES?
Sign up for my email subscriber list and get your FREE
Daily and Weekly To Do List, Free Fitness Planner Printable;
The Ultimate Packing List
and much more to come!
Subscribers Only!
free daily and weekly to do pages