#organizationHome Chic Club: #organization
Showing posts with label #organization. Show all posts

1/13/2022

Free Undated Yearly Planner To Get Organized

Ready to organize all your to-do's like a pro? No problem, I have a Free Printable Yearly Calendar for you. It's FREE & Cute!
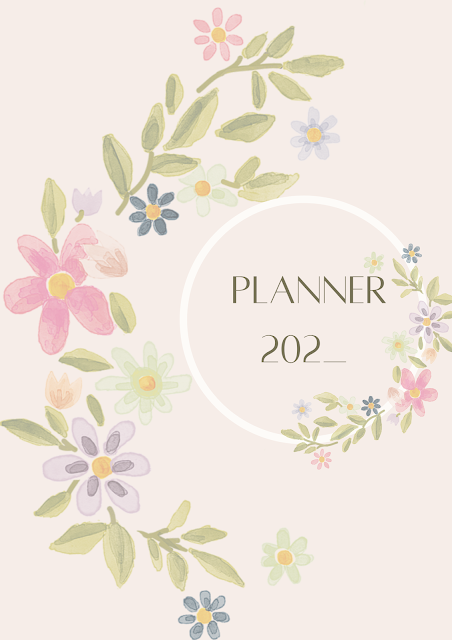
Free Undated Yearly Planner
Have you committed yourself to get and stay organized in 2022? Here is my free yearly  printable calendar, just for you! It`s undated, so you  can use it for 2022 or any year! 
It’s time for to think more about look forward for the year in a practical way. What tasks you need to do every month to make the life more organize, what kind of things you need to do to archive your main goals (being healthier, decorate your entire home, be consistent with your activities, take better care of yourself), or any other projects.
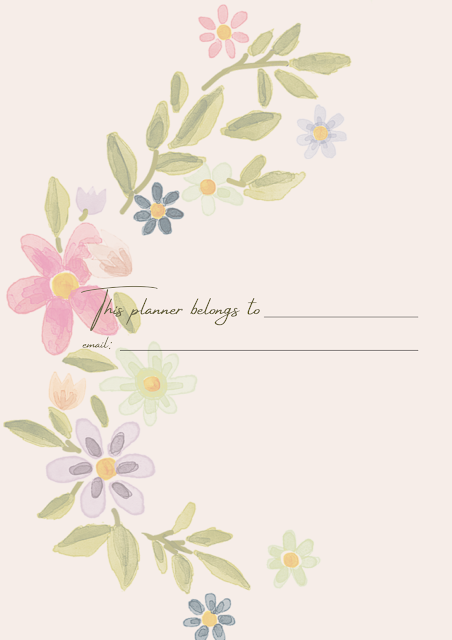
Free Undated Yearly Planner
If you know me, you`ll know I need to write everything to organize. It may be on a personal notebook, journal or even on my cellphone notes. Writing is very important to declutter my mind and organize my everyday life. Writing the things that I need to complete, dates of project, deadlines and other activities of my daily routine is very important. That`s why I love my planner and always have it on hand. I make lists, write down ideas for my blog, make budget plan, meal plan etc. Monthly planner is a great for the quick overview of everything I need to do in a current month and a starting point for daily planning. It can help so much to stay on track, so there`s just few ideas how you can use it.
Free Undated Yearly Planner

Use this free printable calendar to:

• Keep track of appointments

• Schedule decluttering tasks

• Plan meals

• Chart weight loss

• Track new habits

• Schedule exercise

• Budget

• Keep track of paydays

• Chart milestones

And so much more!
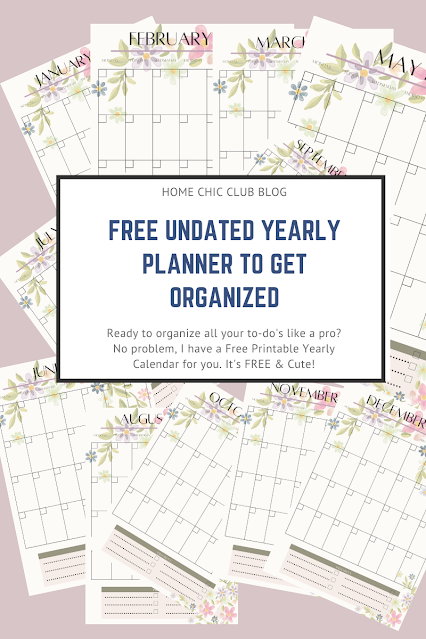
Free Undated Yearly Planner

Free Yearly Printable Planner

As for me, every year is different, with many unexpected events and situations happening. My schedule changes very often and especially at those times, my calendar provided me with a solid basis to deal with those changes.

Hopefully, 2022 will bring us more stability and less challenges. Regardless of our hopes for the new year, this free printable planner will help you start and stay organized! 

Helpful Tips


- To download Free Undated Yearly Planner, just click on the button below and it will open in a new page. Click on download and save to your computer.

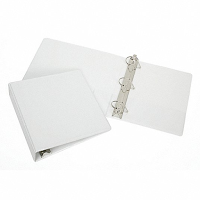
-Print the Free Undated Yearly Planner  and put it in a 3-Ring binder. 
Free Undated Yearly Planner
-You can also add other planner printables I shared on the blog. You can find them HERE, HERE, HEREHERE, HERE and HERE

- You can also check my Free Printables on Pinterest for more fun and interesting freebies! 

- You can print as many as you need.
- Share with your family, friends and co-workers and subscribe for more!
- Pin it now and save for later!
Follow us on Pinterest for lots more freebies!

PIN ME
Free Undated Yearly Planner

Follow me on Pinterest HERE  
Find my Free Printables HERE
_____________
Keep in touch!
Love FREE PRINTABLE?
Sign up for my email subscriber list and get your FREE
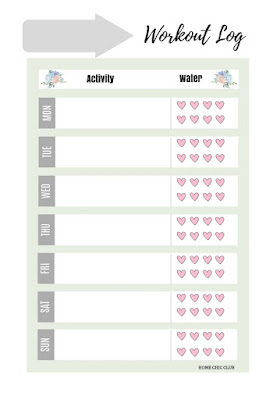
Daily and Weekly To Do List, Free Fitness Planner Printable;
The Ultimate Packing List
and much more to come!
Subscribers Only!

3/17/2017

DIY Easter Basket

Hey guys! For those of you who are new to my blog, welcome and enjoy! My name is Vesna and I`m a full time blogger, blogging about everything home and lifestyle related. 
I hope you're ready for the new ideas, because we are continuing with spring crafts and you don't want to miss this DIY Easter rope woven basket that is actually super easy to make! These Easter baskets would be such a fun project for the family and kids to do together! They can decorate their own basket and then take it out for the Easter egg hunt!
Easter, is one of my favorite holidays and I always try some new diy project to make it even more special! 
You can make these adorable Easter baskets as big, or as small and use it for almost anything after Easter! They are adorable and up-to-date all year around! 

Zdravo svima! Za one koji su prvi put na blogu, dobro došli, nadam se da ćete uživati. Moje ime je Vesna, ja sam bloger i pišem o svemu što je vezano za dom i stil. Nadam se da ste spremni za nove ideje, jer nastavljamo sa prolećnim projektima, a vi ne želite da propustite ovu Uskršnju pletenu korpu od kanapa koja se pravi vrlo jednostavno! Ovo može da bude i vrlo zabavan projekat za celu porodicu, a deca mogu da ih dekorišu i pune šarenim jajima. Uskras je jedan od mojih omiljenih praznika, uživam u farbanju jaja i uradi sam projektima koji će praznik učiniti još lepšim. Zato sam želela da sa vama podelim ovu jednostavnu i efektnu ideju.
Veličinu korpe odredite sami, napravite veliku ili malu i koristite je, ne samo tokom Uskršnjih praznika, već i kasnije za odlaganje bilo čega! 

You will need:
- bowl or other container any sizes you need,
- jute rope,
- plastic wrap,
- scissors,
- school or any type of white glue,
- glue gun and glue sticks.

Materijal:
- činija ili druga posuda u veličini koja vama odgovara,
- kanap,
- providna samolepljiva folija,
- makaze,
- školski ili dr. beli lepak,
- pištolj za vrući lepak i štapići lepka

Tutorial:
First wrap your bowl in a plastic wrap and turn it up side down. Add a small dot of white glue in the middle of the bowl and start wrapping the jute in a circle motion. Be sure your rope is tight, so pull it gently whenever you create a new circle. Often press the finished part with your hand to flatten it down. Add another circle of glue and keep on going the same way until you reach the end (or top) of your bowl. Cut the excess rope and glue it. Let it dry over night (or 24 hours). Remove your bowl and plastic wrap carefully from your basket (I must warn you, that part is quite difficult). 
For the handles cut 3 pieces of rope in a desired length and make a braid. Repeat for the another handle. Attach handles to your basket with a hot glue gun and that`s it! You can also paint your basket to make it more colorful or leave as is, it will be equally beautiful either way. 

Tutorijal: 
Prvo obmotajte svoju činiju plastičnom folijom i okrenite je naopako. Stavite malo lepka na sredinu i počnite da obmotavate kanap u krug. Da bi korpa bila stabilna zatežite kanap pažljivo svaki put kada napravite novi krug. Takođe pritiskajte deo koji ste završili dlanom da biste ga izravnali. Dodajte novi krug lepka oko završenog dela i nastavite isti postupak obmotavanja sve dok ne stignete do kraja (ili bolje rečeno vrha) vaše činije. Odsecite višak kanapa i dobro zalepite. Ostavite da se suši preko noći ili još bolje 24 časa. Potom uklonite činiju i foliju iz vaše korpe pažljivo (moram da kažem da je ovo meni bio najteži deo postupka).
Za drške korpe isecite 3 parčeta kanapa u željenoj dužini i ispletite pletenicu. Ponovite isti postupak za drugu dršku. Pričvrstite drške vrućim lepkom i to je to, korpa je gotova! Korpu možete obojiti, ako želite ili je ostaviti u prirodnoj boji, biće jednako lepa šta god odlučili. 
Fill your basket with colored eggs and candy, add a bow, feathers or flowers and enjoy! This is also such a fun way to gift a basket! Who will you make a Easter Basket for?

Napunite svoju korpicu šarenim jajima, slatkišima i ukrasite mašnom, perjem ili cvećem i uživajte! Ovo je takođe i super ideja da nekome napravite poklon za Uskrs! Kome biste vi poklonili ovakvu Uskršnju korpicu?

3/13/2017

DIY Storage Box/Cardboard recycling

Hey guys! For those of you who are new to my blog, welcome and enjoy! My name is Vesna and I`m a full time blogger, blogging about everything home and lifestyle related. I hope you enjoyed your weekend and you're ready for a new week and new ideas!
Today’s project is all about organization. As I mentioned in this post, best way to have a beautiful space is to organize it. In this post you will see how to up-cycle cardboard boxes into beautiful storage boxes. They will help you declutter your space and organize your pantry, craft materials, linens, tablecloths, napkins or anything else. And they are super easy to make!
Zdravo svima! Za one koji su prvi put na blogu, dobro došli, nadam se da ćete uživati. Moje ime je Vesna, ja sam bloger i pišem o svemu što je vezano za dom i stil. Nadam se da ste uživali u vikendu i da ste spremni za novu nedelju i nove ideje!
Kao što sam pomenula u ovom postu, organizovan prostor nam olakšava i ulepšava život. Zato je i današnji projekat posvećen organizaciji i sređivanju životnog prostora, jer niko ne želi gomile sitnica i stvari kojima ne može da nađe mesto, zar ne? U ovom postu ćete videti kako da reciklirate običnu kartonsku kutiju i pretvorite je u lepu korpu za odlaganje. Ovakve korpe su savršene za organizaciju sitnica u kuhinji, kupatilu, za odlaganje kraft materijala, stolnjaka, salveta ili bilo čega drugog i super su jednostavne za pravljenje.

You will need:
- cardboard box of any sizes you need,
- fabric, such as burlap in my case,
- hot glue gun and glue sticks,
- ribbon
Materijal:
- kartonska kutija u veličini koja vam odgovara,
- juta ili neki drugi materijal po izboru,
- pištolj za vrući lepak i štapići lepka,
- ukrasna traka ili mašna.

Tutorial:
First cut the lids off your box, or if you need a deeper box, just tape them together, like I do.
Tutorijal: 
Prvo odsecite sve četiri strane poklopca kutije ili, ako vam je potrebna dublja kutija, zalepite ih selotejpom kao ja.
Cut a piece of burlap slightly longer than the total length of all 4 sides of the box (Tip: the easiest way is to wrap the fabric around the box to measure it). 
Isecite materijal ili jutu nešto duže od dužine kutije (Savet: jednostavno obmotajte materijal oko kutije da procenite potrebnu dužinu).
Make sure to leave fabric wide enough to bend it inside of the box and cover the edges, and wide enough to cover the half of the box bottom (it`s hard to explain, but you can see me showing this on the photo above).
Materijal mora da bude dovoljno širok da može da pokrije širinu kutije i savije se unutar gornje ivice kutije, a za pokrivanje dna ostavite širinu u polovini širine kutije - preklapanjem će te dve polovine pokriti celo dno (malo je komplikovano da se opiše, ali zato sam pokazala na slici gore). 
Start by gluing one side of the box. Press and smooth out the fabric before starting on the next side. Rotate the box as you apply glue to each side and glue the fabric.
Prvo zalepite jednu stranu kutije vrućim lepkom. Poravnajte i pritisnite pre nego što pređete na sledeću stranu. Okrećite kutiju i zalepite sve četiri strane. 
After the 4 side are glued in place, finish by snipping the burlap where the corner turns, fold and glue the side pieces to the bottom. 
Kada su sve strane zalepljene, okrenite kutiju naopako da uradite dno. Prvo zasecite sva četiri ugla kutije, presavijte strane i zalepite svaku preklapajući ih međusobno.
Turn the box, and glue the edges of the burlap inside, making sure that everything is tight and smooth. Box is now covered in burlap  and you can decorate it with a cute ribbon, or fabric flower and leave it like this. But, I wanted my box to have an inside cover, but I was not really in a mood to sew... So, I got this, a little bit unusual idea, but  it actually worked!
Okrenite kutiju i zalepite višak materijala unutra, pazeći da je sve lepo zategnuto i glatko. Vaša kutija je sada sa svih strana pokrivena materijalom i možete ovde da završite postupak. Dodajte spolja neku ukrasnu traku, cvet ili mašnu i gotovo. Ali, ja sam želela da moja kutija ima i unutrašnju presvlaku, ali nisam bila baš raspoložena da šijem... A onda sam došla na pomalo neobičnu ideju koja je naposletku funkcionisala!
I found a large pillow case and put it with a good side over the box. Then, I fold the edges of the pillow case to make it neater from outside. Put the rest of the pillow case inside, fold the fabric on the bottom to look nice, tighten all sides, and there it was! My simple and perfect idea for no sew inside cover
Pronašla sam veliku jastučnicu i stavila je licem preko kutije. Savila sam ivice jastučnice unutra kako bi bile uredne i lepe spolja. Ostatak jastučnice sam ubacila unutra, sve lepo savila i zategla i gotovo! Moja jednostavna i savršena ideja za unutrašnju presvlaku bez šivenja!!
All I need to do after was to sew a little bow to make it pretty and my DIY storage box was done! I really had fun realizing this project. What do you think?Do you like to recycle?
Na kraju sam prišila mašnu da bude lepša i "uradi sam" korpa za odlaganje je bila završena! Volela bih da čujem da li vam se dopao ovaj projekat i da li volite da reciklirate?
P I N  T H I S  F O R  L A T E R ! !

2/25/2017

Free Printable Kitchen and Pantry Labels

Hello guys and happy weekend! For those of you who are new to my blog, welcome and enjoy! My name is Vesna and I`m a full time blogger, blogging about everything home and lifestyle related.
Spring is upon us and we'll do our best to make our homes more beautiful and cleaner. Why not start with the organization, it saves both time and space!!In today`s post I`m sharing something to help you organize, because every home needs more organization, right?!! 
I love to be organized and to have dedicated place for everything in my house, so it`s no surprise I go nuts every time my hubby do his thing (chaos, of course). But, to tell you the whole truth, sometimes I`m lazy, sloppy and chaotic too, because life is too precious to be so obsessive. We have the right to be lazy sometimes, right?
Still, I think you`ll agree with me, some places in our homes always need a little more organization, and these are definitely kitchen and pantry. We all know how frustrating is when we are making dinner and start looking for something we need and lose the whole 10 minutes on it (not to mention how annoying is that). At the time we finally find it, our dinner on the stove is burned and ruined. Then we have to lose more time (and nerves) to try to fix it, or even start all over again. I don`t know about you, but it happens to me. So, finally I decided to organize everything you can find in the kitchen and pantry with this cute labels and stop losing valuable time.

Zdravo dragi moji, srećan vikend! Za one koji su prvi put na mom blogu, dobro došli, nadam se da ćete uživati. Moje ime je Vesna, ja sam bloger i pišem o svemu što je vezano za dom i stil.
Proleće je pred nama i svi ćemo se potruditi da naši domovi budu lepši i uredniji. Zašto ne početi od organizacije, kada ona štedi i vreme i prostor. U današnjem postu želim da sa vama podelim nešto što će vam pomoći u tome. 
Ja sam prilično organizovana i volim da je sve na svom mestu, pa nije ni čudo što poludim svaki put kada vidim da je moj mužić opet protutnjao kroz kuću kao tornado ostavljajući za sobom neverovatan haos. Ipak, ako želim da budem totalno iskrena, moram da priznam da sam ponekad i ja lenja, nemarna i haotična, jer, složićete se, život je ipak previše dragocen da svaki trenutak mislimo samo o tome kako biti praktičan i organizovan. 

Verujem da ćete se takođe složiti da neka mesta u našim kućama definitivno uvek žude za malo više organizacije, a to su pre svega kuhinja i ostava. Svi znamo kako je to kada počnemo da kuvamo i shvatimo da nam nešto nedostaje. Onda krenemo da tražimo i preturamo po policama i fijokama i izgubimo celih 10 minuta (o živcima da i ne govorim), a za to vreme nam jelo pokipi ili zagori i bude uništeno. Ne znam za vas, ali meni se to dešavalo. Koliko mi onda još vremena treba da to jelo spasim ili ponovo pripremim... Zato sam odlučila da napravim ove nalepnice i počnem da sređujem police i ormariće i uštedim dragoceno vreme. 
I designed this labels to help you get started improving the organization and appearance of those two places in your home. I`m sharing two sets (with 9 labels each) of kitchen and pantry labels today. One set of labels are in pre-designed and filled templates, and another is not filled, so you can add what ever you need on them. Both are ready to print on your laser and inkjet printers, preferably on the sticker paper (you can find it on Amazon) and you can print them as many times as you want. If you can`t find sticker paper, print them on regular paper, glue on your jar and add a scotch tape on top to protect them. Be sure to set your printer on landscape to print them correctly. 
These free printables are for personal use only and may not be resold, or for commercial use. Contact me directly via my website if you want to discuss anything beyond personal use.
Spring is upon us and we'll do our best to make our homes more beautiful and cleaner. Why not start from the organization, it saves time and space !! Hope you guys enjoy them as much as I do! If you ever use any of my printables, I would love to see your creations! Tag me on Instagram so I can see @homechicclub.

Ove nalepnice sam dizajnirala da se pokrenem i malo bolje organizujem, a usput i da sve izgleda lepše i urednije. Pred vama su dva seta po 9 nalepnica. Jedan set nalepnica je popunjen, a drugi nije, tako da ih možete upotrebiti za bilo koju namenu. Nalepnice su spremne za štampu i možete ih štampati na laser ili inkjet štampaču, koliko god puta želite. Najbolje bi bilo da upotrebite papir za nalepnice - stiker papir (ja sam ga kupila u Metro-u), ali ih možete odštampati i na običnom papiru i zalepiti lepkom na vaše teglice. U tom slučaju, preporučujem da ih odozgo prelepite širokim selotejpom i tako ih zaštitite od habanja. Obavezno podesite svoj papir na landscape prikaz kako bi se pravilno odštampale.
Ovaj besplatni uzorak je samo za ličnu upotrebu i ne može se prodavati ili upotrebljavati u komercijalne svrhe. Kontaktirajte me preko ovog linka ako želite da ih upotrebite u bilo koju drugu svrhu osim za ličnu upotrebu.
Nadam se da ćete uživati u njima koliko i ja!! Ako ih upotrebite, volela bih da vidim vaše lepe police i predivne teglice! Tagujte me na Instagramu kako bih mogla da ih vidim @homechicclub.
Did you find this article on how to organize your kitchen and pantry helpful?
Free Printable 
Kitchen and Pantry Labels 

Click on the links below to download your kitchen labels:

Preuzmite svoje kuhinjske nalepnice klikom na linkove ispod:
Kuhinjske etikete - popunjene
Kuhinjske etikete - prazne

P I N  T H I S  F O R  L A T E R!!